Hi
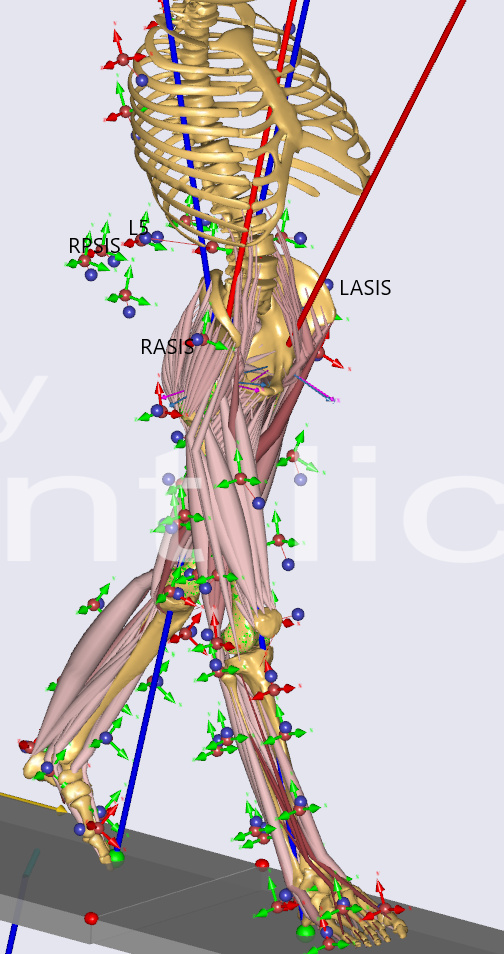
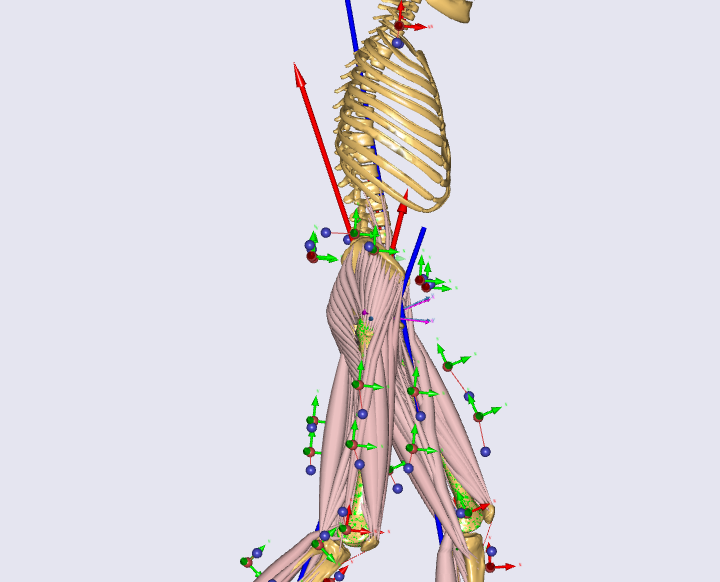
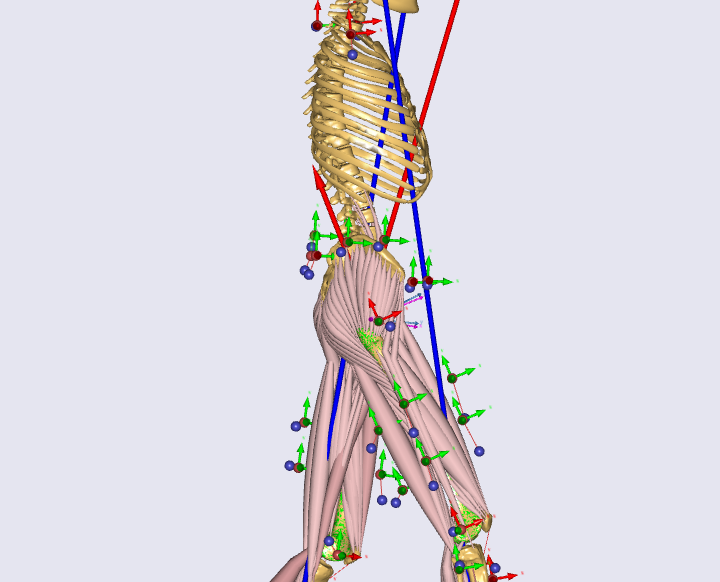
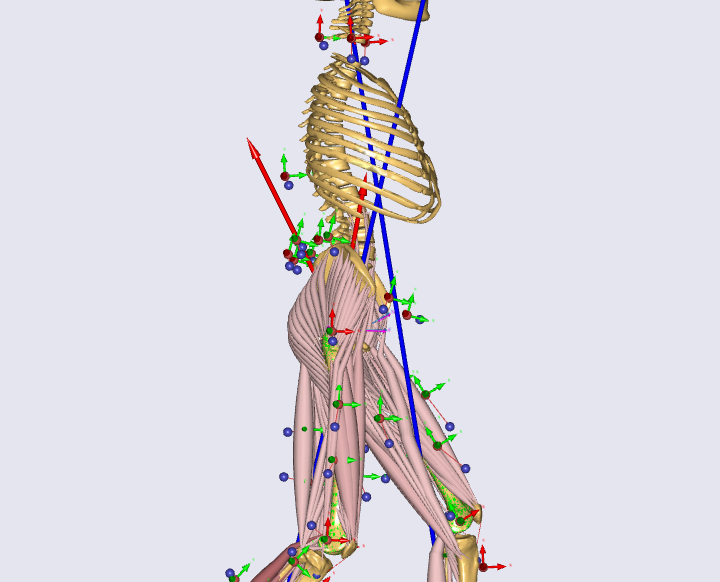
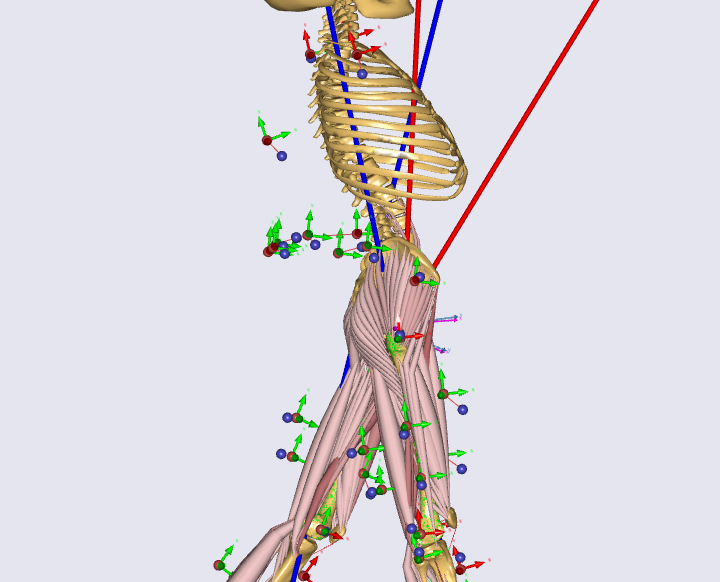
The adaption of pelvis/thorax to this trial does not seem to be optimal. What do you think?
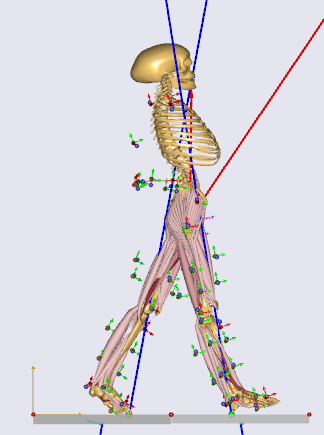
Best regards
Max
Hi
The adaption of pelvis/thorax to this trial does not seem to be optimal. What do you think?
Best regards
Max
Hi Max,
I agree it looks not optimal though it is difficult to see markers on image.
Looks to me like pelvis should be more forward.
Best regards
Søren
Hi Max,
Yes of course you are right, markers to move forward which will move pelvis backwards
Best regards
Søren
Hi Søren
Are there any options to allow more tilting of the pelvis or to improve the sagittal spinal-pelvic-femoral alignment?
Maybe an increase of the weights of the spinal markers?
Best regards
Max
Hi Max,
Pelvic tilt can be altered by moving pelvis markers upwards and downwards.
The tilt will not be altered much by changing spine marker positions.
Best regards
Søren
Hi Søren
By moving the pelvis markers I would have to alter the marker protocol, right? However, I have 10 subjects that use the same marker protocol and the pelvic tilt or sagittal spinal-pelvic-femoral alignment of the other subjects looks quite good. Maybe except H3 and the subject from above H10?
So I would like to avoid to change the marker positions in the marker protocol. Is this the only possibility to change the pelvic tilt?
Best regards
Max
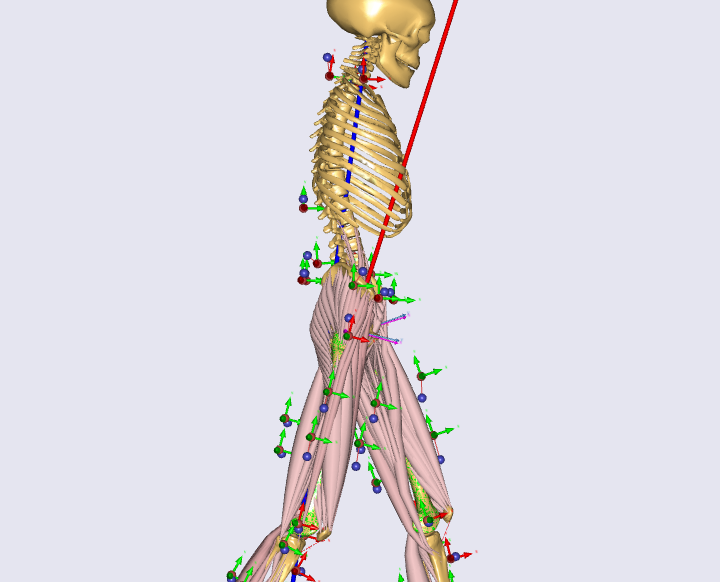
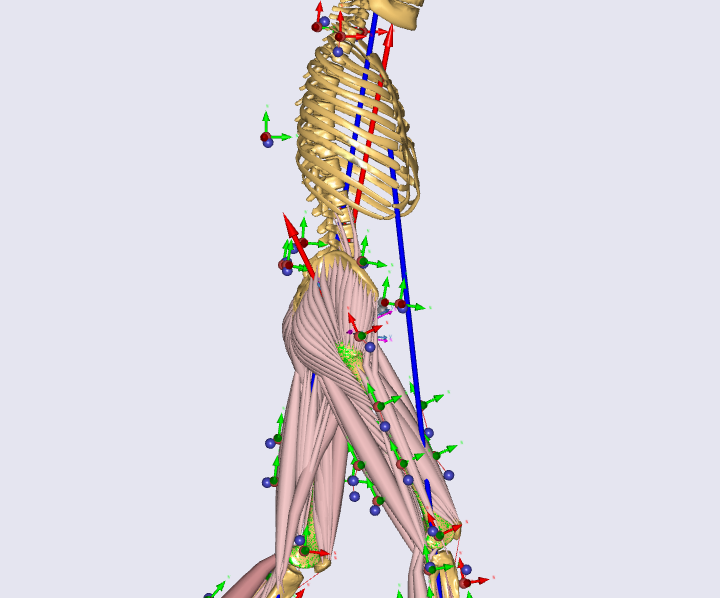
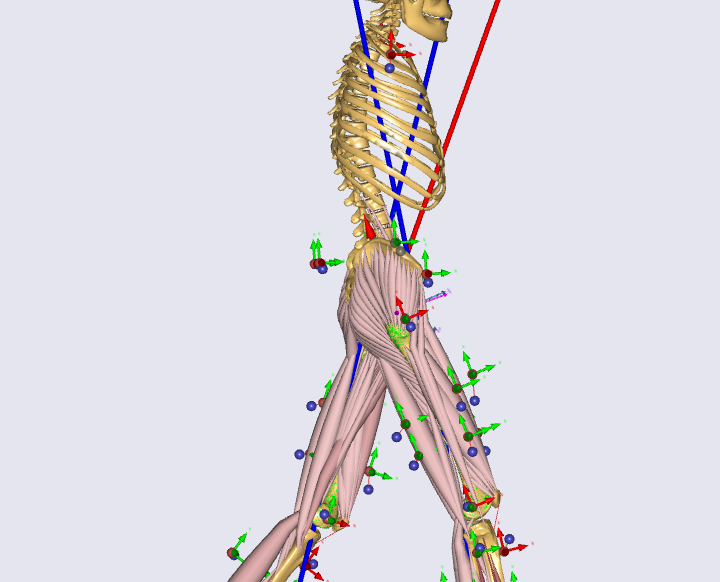
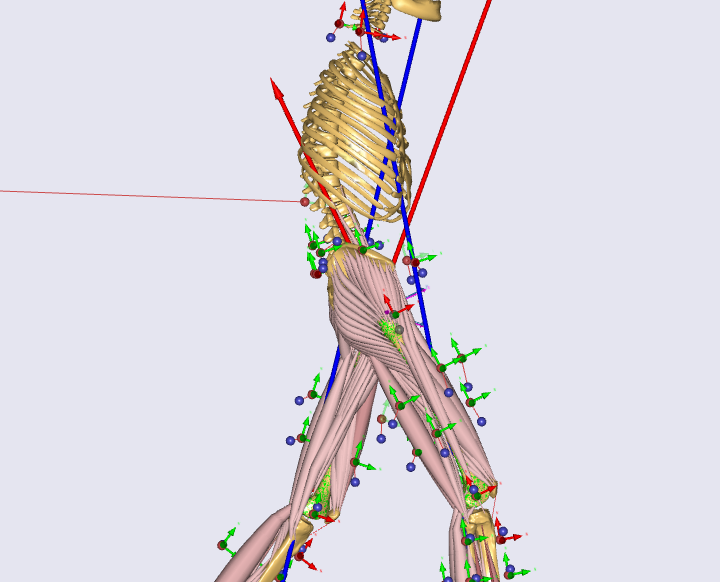
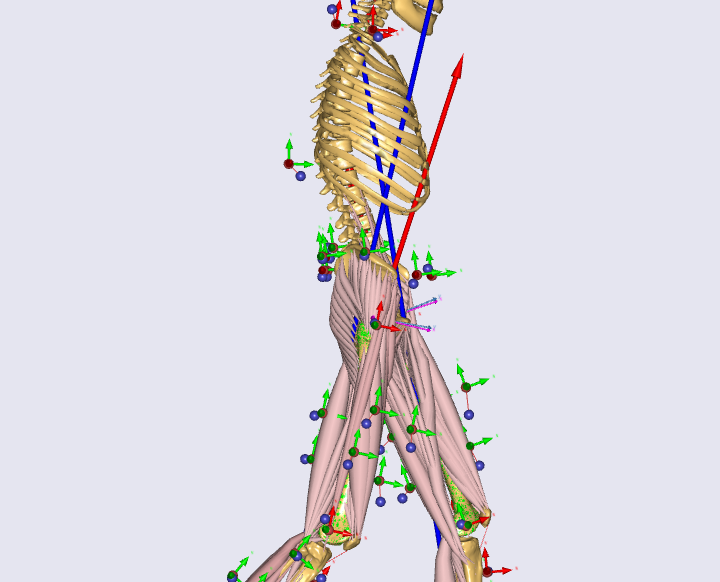
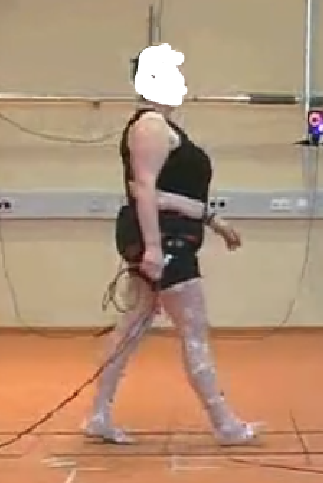
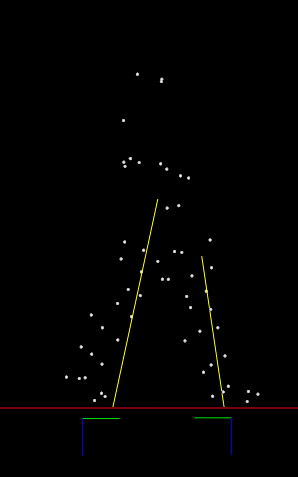
Here are pictures of the 10 subjects. The subject in the first post is H10:
H1:
Hi Max
The upper body is completely irrelevant in your case, because you have ground reaction forces and "hand-of-god" (reactions) on the pelvis. So I would remove the trunk markers, add a constant driver to those segments and then hide the visual representation of thorax, neck and head.
But what is very relevant is the position of the pelvis relative to the markers. Modeling obese subjects is difficult. In your maker protocol you have some assumption where the markers are placed (the markers on bony landmarks which are not optimized). But in your experimental setup you place the markers quite far away from there landmarks because of adipose tissue. A few cm error of the hip positions have easily cause +/-100%BW on the hip contact force. So matching the experimental marker positions is very important.
Also, I see a few potential problems with your problems with your marker protocol in AMS. You seem to optimize all markers on the pelvis. Hence, the pelvic tilt can be difficult to control. I do have a lot of small tricks you can use. Like constraining markers positions relative to each other. But if you come up with a good marker protocol and procedure for obese subjects let me know 
Hi Morten
I was aware that the upper body doesn't have an effect on the inverse dynamics. However, I thought the lower spinal markers would have an effect on the pelvic tilt. I will remove the spinal an shoulder markers from the protocol. Then I have to switch the following driver parameters to ON, right?
BM_MANNEQUIN_DRIVER_NECK
BM_MANNEQUIN_DRIVER_SKULL_THORAX_FLEXION
BM_MANNEQUIN_DRIVER_SKULL_THORAX_LATERALBENDING
BM_MANNEQUIN_DRIVER_SKULL_THORAX_ROTATION
BM_MANNEQUIN_DRIVER_PELVIS_THORAX_LATERAL_BENDING
BM_MANNEQUIN_DRIVER_PELVIS_THORAX_ROTATION
BM_MANNEQUIN_DRIVER_PELVIS_THORAX_EXTENSION
I already thought that it would be useful to constrain the optimization in specific directions. For example, the ASISs landmarks of the pelvis should not be anterior to the ASISs MoCap markers (as it can be seen for subject H10).
The ASIS MoCap markers should only be allowed to move in anterior (positive x) direction due to the soft tissue and not in posterior (negative x) direction. Vice versa for the PSISs.
I'm happy to hear your tricks to avoid such problems or feel free to adapt the protocol yourself. (master branch  )
)
Regarding the obese subjects:
I assume that in moderate obese people the spinal markers are less effected by soft tissue artifacts than the markers on the front, such as the ASISs markers. There should not be much fat tissue on the spine in moderate obese people, right? Maybe the lower spinal markers should be attached to "Trunk.SegmentsLumbar.PelvisSeg" to optimize the pelvic tilt?
What I would like to avoid is to start fiddeling around with the marker protocol for each subject.
Of course, specific conditional statements can be included in the marker protocol for instance based on the BMI?
Best regards
Max
Hi Max
It does make sense to include the lower spinal markers, and maybe even trunk markers. They may help determine pelvic motion a bit.
The BM_MANNEQUIN switches are the easiest way to quickly add drivers to those un-supported DOFs. But I would still hide the graphincs for the thorax, neck and head segments. Especially because the scale weirdly with high subject mass.
I already thought that it would be useful to constrain the optimization in specific directions.
I am not only thinking about directions. You can also constrain markers to move together. You can do this with design constraints in you marker optimization study.
In your your parameter optimization study you could add the following:
Main.Studies.ParameterIdentification =
{

     AnyDesMeasure LinkAsisXDir = {
         Type = EqualToZero;
         Val = .RASIS_X.Val - LASIS_X.Val;
     };

};
This will constrain the right and left side ASIS markers to have the same position in the x direction.
You can do something similar with for example the knee where if the lateral marker moves away the medial have to do same but in the opposite direction. Hence, keeping the knee in the middle between the markers.
Main.Studies.ParameterIdentification =
{

     AnyDesMeasure LinkRKneeMarkersisZDir = {
         Type = EqualToZero;
         // Here the design vars are added if one moves right the other must move left
         Val = .R_MedKnee_Z.Val + .R_LatKnee_Z.Val;
     };

};
With this approach we assume the same amount of adipose tissue on both side of the knee center. But we could add a gearing if we needed. (e.g. 60/40%: Val = 0.6*.R_MedKnee_Z.Val + 0.4*.R_LatKnee_Z.Val;)
The AnyMoCap framwork even has a little convenience class_template (called LinkDesignVars ) to add these constraints directly from your marker protocol file.
The two examples above could be added from the marker protocol file with the following:
LinkDesignVars EqualAsisMarkerXDir(DesVar1=RASIS_Z, DesVar1=LASIS_Z);


LinkDesignVars SymetricRightKneeMarkers(
    DesVar1 =R_MedKnee_Z,
    DesVar2=R_LatKnee_Z,
    Coef1 = 1,
    Coef2= -1
)={  };
I have also used this to constrain the ASIS/PSIS markers such that if the asis markers move forward the psis markers need to move backwards by a similar amount. Keeping the pelvis in the middle.
For this to work the ASIS/PSIS markers must be placed relative to the bony landmark and not the anatomical frame (which is default and located between the asis markers). You do that by defining the pelvis markers like this:
CreateMarkerDriver RASIS(
MarkerName= RASIS,
UseC3DWeightResiduals = ON,
MarkerPlacement=Trunk.SegmentsLumbar.PelvisSeg,
OptX=ON, OptY=OFF, OptZ=OFF,
PlaceMarkerAt=Right.ASIS
) = {
  sRelOpt = {0.030,0.000,0};
};
Note the: PlaceMarkerAt=Right.ASIS. This means that the design parameter is relative to the ASIS bony landmark.
What I would like to avoid is to start fiddeling around with the marker protocol for each subject.
Of course, specific conditional statements can be included in the marker protocol for instance based on the BMI?
It is really hard to avoid that when the experimental markers have different distances to bony landmarks. The only real solution to this is to use virtual palpated markers in the experimental setup. But that is complicated and only few MoCap systems support that.
Hi Morten
I adapted the marker protocol. However, the Parameter Identification of the standing reference trial does not seem to converge anymore:
0.1.0.95.0) Optimization step (Operation: Main.Studies.ParameterIdentification.ParameterOptimization):
0.1.0.95.0.0) Evaluating KKT conditions (Operation: Main.Studies.ParameterIdentification.ParameterOptimization):
The marker protocol looks like this:
#define _LKneeMarkerSymmetryConstraint
#define _RKneeMarkerSymmetryConstraint
#define _PsisSymmetryConstraint
#define _AsisSymmetryConstraint
#define _SIS_SymmetryConstraint
// #define _GTRSymmetryConstraint (defined in *_TrialSpecificData.any)
#define _SHO_SymmetryConstraint


//////// TRUNK ////////
////Marker on the Right Acromion
//#ifdef _RSHO
//CreateMarkerDriver RSHO (
//MarkerName= RSHO,
//MarkerPlacement=Trunk.SegmentsThorax.ThoraxSeg,
//OptX=OFF, OptY=OFF, OptZ=OFF,
//WeightX = 1.0, WeightY = 1.0, WeightZ = 1.0,
//UseC3DWeightResiduals = ON
//) = {
//  sRelOpt = {0.07,0.46,0.17};
//};
//#endif
////Marker on the Left Acromion
//#ifdef _LSHO
//CreateMarkerDriver LSHO (
//MarkerName= LSHO,
//MarkerPlacement=Trunk.SegmentsThorax.ThoraxSeg,
//OptX=OFF, OptY=OFF, OptZ=OFF,
//WeightX = 1.0, WeightY = 1.0, WeightZ = 1.0,
//UseC3DWeightResiduals = ON
//) = {
//  sRelOpt = {0.07,0.46,-0.17};
//};
//#endif
//// Marker on the Cervical Vertebra 7
//#ifdef _C7
//CreateMarkerDriver C7 (
//MarkerName= C7,
//MarkerPlacement=Trunk.SegmentsCervicalSpine.C7Seg,
//PlaceMarkerAt = SpleniusCapitisC7C0NodeR,
//OptX=ON,OptY=OFF,OptZ=OFF,
//WeightX = 1.0, WeightY = 1.0, WeightZ = 1.0,
//UseC3DWeightResiduals = ON,
//ScaleMarkerPosOnOff = OFF
//) = {
//  sRelOpt = {-0.015,0.0,0};
//};
//#endif
// Marker on the Thoracic Vertebra 10
#ifdef _TH12
CreateMarkerDriver TH12 (
MarkerName= TH12,
MarkerPlacement=Trunk.SegmentsThorax.ThoraxSeg,
OptX=ON, OptY=ON, OptZ=OFF,
WeightX = 1.0, WeightY = 1.0, WeightZ = 1.0,
UseC3DWeightResiduals = ON
) = {
  sRelOpt = {-0.07,0.19,0};
};
#endif
// Marker on the Lumbar Vertebra
#ifdef _L5
CreateMarkerDriver L5 (
MarkerName= L5,
MarkerPlacement=Trunk.SegmentsLumbar.L5Seg,
PlaceMarkerAt = ScalingNode,
OptX=ON,OptY=ON,OptZ=OFF,
WeightX = 1.0, WeightY = 1.0, WeightZ = 1.0,
UseC3DWeightResiduals = ON,
ScaleMarkerPosOnOff = OFF
) = {
  sRelOpt = {-0.03,0.014,0.0};
};
#endif

//////// PELVIS ////////
// Marker on the Right Anterior Superior Iliac
#ifdef _RASIS
CreateMarkerDriver RASIS (
MarkerName= RASIS,
MarkerPlacement=Trunk.SegmentsLumbar.PelvisSeg,
PlaceMarkerAt=Right.ASIS,
OptX=ON, OptY=ON, OptZ=OFF,
WeightX = 1.0, WeightY = 1.0, WeightZ = 1.0,
UseC3DWeightResiduals=ON
) = {
  sRelOpt = {0.03, 0.00, 0.00} ;
};
#endif

// Marker on the Left Anterior Superior Iliac
#ifdef _LASIS
CreateMarkerDriver LASIS (
MarkerName= LASIS ,
MarkerPlacement=Trunk.SegmentsLumbar.PelvisSeg,
PlaceMarkerAt=Left.ASIS,
OptX=ON, OptY=ON, OptZ=OFF,
WeightX = 1.0, WeightY = 1.0, WeightZ = 1.0,
UseC3DWeightResiduals = ON
) = {
  sRelOpt = {0.03, 0.00, 0.00};
};
#endif

// Marker on the Right Posterior Superior Iliac
#ifdef _RPSIS
CreateMarkerDriver RPSIS (
MarkerName= RPSIS,
MarkerPlacement=Trunk.SegmentsLumbar.PelvisSeg,
PlaceMarkerAt=Right.PSIS,
OptX=ON, OptY=ON, OptZ=OFF,
WeightX = 1.0, WeightY = 1.0, WeightZ = 1.0,
UseC3DWeightResiduals = ON
) = {
  sRelOpt = {-0.03, 0.00, 0.00};
};
#endif

// Marker on the Left Posterior Superior Iliac
#ifdef _LPSIS
CreateMarkerDriver LPSIS (
MarkerName= LPSIS,
MarkerPlacement=Trunk.SegmentsLumbar.PelvisSeg,
PlaceMarkerAt=Left.PSIS,
OptX=ON, OptY=ON, OptZ=OFF,
WeightX = 1.0, WeightY = 1.0, WeightZ = 1.0,
UseC3DWeightResiduals = ON
) = {
  sRelOpt = {-0.03, 0.00, 0.00};
};
#endif

// Marker on the Right Crista Iliaca I
#ifdef _RPELV01
CreateMarkerDriver RPELV01 (
MarkerName= RPELV01,
MarkerPlacement=Trunk.SegmentsLumbar.PelvisSeg,
OptX=ON, OptY=ON, OptZ=ON,
WeightX = 0.1, WeightY = 0.1, WeightZ = 0.1,
UseC3DWeightResiduals = ON
) = {
  sRelOpt = {-0.06, 0.05, 0.145};
};
#endif
// Marker on the Left Crista Iliaca I
#ifdef _LPELV01
CreateMarkerDriver LPELV01 (
MarkerName= LPELV01,
MarkerPlacement=Trunk.SegmentsLumbar.PelvisSeg,
OptX=ON, OptY=ON, OptZ=ON,
WeightX = 0.1, WeightY = 0.1, WeightZ = 0.1,
UseC3DWeightResiduals = ON
) = {
  sRelOpt = {-0.06, 0.05, -0.145};
};
#endif
// Marker on the Right Crista Iliaca II
#ifdef _RPELV02
CreateMarkerDriver RPELV02 (
MarkerName= RPELV02,
MarkerPlacement=Trunk.SegmentsLumbar.PelvisSeg,
OptX=ON, OptY=ON, OptZ=ON,
WeightX = 0.1, WeightY = 0.1, WeightZ = 0.1,
UseC3DWeightResiduals = ON
) = {
  sRelOpt = {-0.1, 0.08, 0.10} ;
};
#endif
// Marker on the Left Crista Iliaca II
#ifdef _LPELV02
CreateMarkerDriver LPELV02 (
MarkerName= LPELV02,
MarkerPlacement=Trunk.SegmentsLumbar.PelvisSeg,
OptX=ON, OptY=ON, OptZ=ON,
WeightX = 0.1, WeightY = 0.1, WeightZ = 0.1,
UseC3DWeightResiduals = ON
) = {
  sRelOpt = {-0.1, 0.08, -0.10};
};
#endif


//////// RTHIGH ////////
#ifdef _RGTR
CreateMarkerDriver RGTR (
MarkerName= RGTR,
MarkerPlacement= Right.Leg.Seg.Thigh,
PlaceMarkerAt = EpicondylusFemorisMedialis,
OptX=OFF, OptY=OFF, OptZ=ON,
WeightX = 1.0, WeightY = 1.0, WeightZ = 1.0,
UseC3DWeightResiduals = ON,
ScaleMarkerPosOnOff = ON
) = {
  sRelOpt = {0.01, 0.34, 0.12};
};
#endif
#ifdef _RTHI01
CreateMarkerDriver RTHI01 (
MarkerName= RTHI01 ,
MarkerPlacement= Right.Leg.Seg.Thigh,
OptX=ON, OptY=ON, OptZ=ON,
WeightX = 0.25, WeightY = 0.25, WeightZ = 0.25,
UseC3DWeightResiduals = ON
) = {
  sRelOpt = {0.08, -0.15, -0.05};
};
#endif
#ifdef _RTHI02
CreateMarkerDriver RTHI02 (
MarkerName= RTHI02 ,
MarkerPlacement= Right.Leg.Seg.Thigh,
OptX=ON, OptY=ON, OptZ=ON,
WeightX = 0.25, WeightY = 0.25, WeightZ = 0.25,
UseC3DWeightResiduals = ON
) = {
  sRelOpt = {0.0, -0.15, 0.08};
};
#endif
#ifdef _RTHI03
CreateMarkerDriver RTHI03 (
MarkerName= RTHI03 ,
MarkerPlacement= Right.Leg.Seg.Thigh,
OptX=ON, OptY=ON, OptZ=ON,
WeightX = 0.25, WeightY = 0.25, WeightZ = 0.25,
UseC3DWeightResiduals = ON
) = {
  sRelOpt = {-0.1, -0.2, 0.0};
};
#endif
#ifdef _RTHI04
CreateMarkerDriver RTHI04 (
MarkerName= RTHI04 ,
MarkerPlacement= Right.Leg.Seg.Thigh,
OptX=ON, OptY=ON, OptZ=ON,
WeightX = 0.25, WeightY = 0.25, WeightZ = 0.25,
UseC3DWeightResiduals = ON
) = {
  sRelOpt = {0.1, -0.25, 0.0};
};
#endif
#ifdef _RTHI05
CreateMarkerDriver RTHI05 (
MarkerName= RTHI05 ,
MarkerPlacement= Right.Leg.Seg.Thigh,
OptX=ON, OptY=ON, OptZ=ON,
WeightX = 0.25, WeightY = 0.25, WeightZ = 0.25,
UseC3DWeightResiduals = ON
) = {
  sRelOpt = {0.0, -0.25, 0.08};
};
#endif
#ifdef _RTHI06
CreateMarkerDriver RTHI06 (
MarkerName= RTHI06 ,
MarkerPlacement= Right.Leg.Seg.Thigh,
OptX=ON, OptY=ON, OptZ=ON,
WeightX = 0.25, WeightY = 0.25, WeightZ = 0.25,
UseC3DWeightResiduals = ON
) = {
  sRelOpt = {-0.1, -0.25, 0.00};
};
#endif

//// Right Knee
// Medial Knee
#ifdef _RMCO
CreateMarkerDriver RMCO (
MarkerName= RMCO,
MarkerPlacement= Right.Leg.Seg.Thigh,
PlaceMarkerAt = EpicondylusFemorisMedialis,
OptX=OFF, OptY=ON, OptZ=ON,
WeightX = 1.0, WeightY = 1.0, WeightZ = 1.0,
UseC3DWeightResiduals = ON,
ScaleMarkerPosOnOff = OFF
) = {
  sRelOpt = {0, 0, -0.015};
};
#endif
// Lateral Knee
#ifdef _RLCO
CreateMarkerDriver RLCO (
MarkerName= RLCO,
MarkerPlacement= Right.Leg.Seg.Thigh,
PlaceMarkerAt = EpicondylusFemorisLateralis,
OptX=OFF, OptY=OFF, OptZ=ON,
WeightX = 1.0, WeightY = 1.0, WeightZ = 1.0,
UseC3DWeightResiduals  = ON,
ScaleMarkerPosOnOff = OFF
) = {
  sRelOpt = {0, 0, 0.015};
};
#endif

//////// RSHANK ////////
#ifdef _RCAFI
CreateMarkerDriver RCAFI (
MarkerName= RCAFI,
MarkerPlacement= Right.Leg.Seg.Shank,
PlaceMarkerAt = FibularHead,
OptX=ON, OptY=ON, OptZ=ON,
WeightX = 1.0, WeightY = 1.0, WeightZ = 1.0,
UseC3DWeightResiduals = ON,
ScaleMarkerPosOnOff = ON
) = {
  sRelOpt = {0.01, -0.01, 0.015};
};
#endif
#ifdef _RTUTI
CreateMarkerDriver RTUTI (
MarkerName= RTUTI,
MarkerPlacement= Right.Leg.Seg.Shank,
PlaceMarkerAt = TibialTuberosity,
OptX=OFF, OptY=OFF, OptZ=OFF,
WeightX = 1.0, WeightY = 1.0, WeightZ = 1.0,
UseC3DWeightResiduals = ON,
ScaleMarkerPosOnOff = ON
) = {
  sRelOpt = {0.01, 0.00, 0.00};
};
#endif

#ifdef _RSHA01
CreateMarkerDriver RSHA01 (
MarkerName= RSHA01 ,
MarkerPlacement= Right.Leg.Seg.Shank,
OptX=ON, OptY=ON, OptZ=ON,
WeightX = 0.25, WeightY = 0.25, WeightZ = 0.25,
UseC3DWeightResiduals = ON
) = {
  sRelOpt = {0.05, -0.13, 0.00};
};
#endif
#ifdef _RSHA02
CreateMarkerDriver RSHA02 (
MarkerName= RSHA02 ,
MarkerPlacement= Right.Leg.Seg.Shank,
OptX=ON, OptY=ON, OptZ=ON,
WeightX = 0.25, WeightY = 0.25, WeightZ = 0.25,
UseC3DWeightResiduals = ON
) = {
  sRelOpt = {0.01, -0.13, 0.05};
};
#endif
#ifdef _RSHA03
CreateMarkerDriver RSHA03 (
MarkerName= RSHA03 ,
MarkerPlacement= Right.Leg.Seg.Shank,
OptX=ON, OptY=ON, OptZ=ON,
WeightX = 0.25, WeightY = 0.25, WeightZ = 0.25,
UseC3DWeightResiduals = ON
) = {
  sRelOpt = {-0.1, -0.13, 0.00};
};
#endif
#ifdef _RSHA04
CreateMarkerDriver RSHA04 (
MarkerName= RSHA04 ,
MarkerPlacement= Right.Leg.Seg.Shank,
OptX=ON, OptY=ON, OptZ=ON,
WeightX = 0.25, WeightY = 0.25, WeightZ = 0.25,
UseC3DWeightResiduals = ON
) = {
  sRelOpt = {0.05, -0.23, 0.00};
};
#endif
#ifdef _RSHA05
CreateMarkerDriver RSHA05 (
MarkerName= RSHA05 ,
MarkerPlacement= Right.Leg.Seg.Shank,
OptX=ON, OptY=ON, OptZ=ON,
WeightX = 0.25, WeightY = 0.25, WeightZ = 0.25,
UseC3DWeightResiduals = ON
) = {
  sRelOpt = {0.01, -0.23, 0.05};
};
#endif
#ifdef _RSHA06
CreateMarkerDriver RSHA06 (
MarkerName= RSHA06 ,
MarkerPlacement= Right.Leg.Seg.Shank,
OptX=ON, OptY=ON, OptZ=ON,
WeightX = 0.25, WeightY = 0.25, WeightZ = 0.25,
UseC3DWeightResiduals = ON
) = {
  sRelOpt = {-0.08, -0.23, 0.00};
};
#endif

// Right Lateral Ankle
#ifdef _RLMA
CreateMarkerDriver RLMA (
MarkerName= RLMA ,
MarkerPlacement=Right.Leg.Seg.Shank,
PlaceMarkerAt = LateralMalleolus,
OptX=OFF, OptY=ON, OptZ=ON,
WeightX = 1.0, WeightY = 1.0, WeightZ = 1.0,
UseC3DWeightResiduals = ON,
ScaleMarkerPosOnOff = OFF
) = {
  sRelOpt = {0.00, 0.00, 0.01};
};
#endif
// Right Medial Ankle
#ifdef _RMMA
CreateMarkerDriver RMMA (
MarkerName= RMMA ,
MarkerPlacement=Right.Leg.Seg.Shank,
PlaceMarkerAt = MedialMalleolus,
OptX=ON,OptY=ON,OptZ=ON,
WeightX = 1.0, WeightY = 1.0, WeightZ = 1.0,
UseC3DWeightResiduals = ON,
ScaleMarkerPosOnOff = OFF
) = {
  sRelOpt = {0.00, 0.00, -0.01};
};
#endif

//////// RFOOT ////////
// Toe1 metatarsal
#ifdef _RMET01
CreateMarkerDriver RMET01(
MarkerName= RMET01,
MarkerPlacement=Right.Leg.Seg.Foot,
PlaceMarkerAt = MetatarsalJoint1Node,
OptX=OFF , OptY=OFF , OptZ=OFF,
WeightX = 1.0, WeightY = 1.0, WeightZ = 1.0,
UseC3DWeightResiduals = ON,
ScaleMarkerPosOnOff = OFF
) = {
  sRelOpt = {0.0, 0.015, 0.00};
};
#endif
#ifdef _RTOE
CreateMarkerDriver RTOE (
MarkerName= RTOE ,
MarkerPlacement=Right.Leg.Seg.Foot,
PlaceMarkerAt = MetatarsalJoint3Node,
OptX=ON, OptY=ON , OptZ=ON,
WeightX = 1.0, WeightY = 1.0, WeightZ = 1.0,
UseC3DWeightResiduals = ON,
ScaleMarkerPosOnOff = ON
) = {
  sRelOpt = {-0.02, 0.02, 0.0};
};
#endif
// Toe5 metatarsal
#ifdef _RMET05
CreateMarkerDriver RMET05(
MarkerName= RMET05,
MarkerPlacement=Right.Leg.Seg.Foot,
PlaceMarkerAt = MetatarsalJoint5Node,
OptX=ON , OptY=OFF , OptZ=ON,
WeightX = 1.0, WeightY = 1.0, WeightZ = 1.0,
UseC3DWeightResiduals = ON,
ScaleMarkerPosOnOff = OFF
) = {
  sRelOpt = {0.0, 0.0, 0.02};
};
#endif
#ifdef _RHEEL
CreateMarkerDriver RHEEL (
MarkerName= RHEEL ,
MarkerPlacement = Right.Leg.Seg.Foot,
PlaceMarkerAt = HeelNode,
OptX=OFF, OptY=OFF, OptZ=OFF,
WeightX = 1.0, WeightY = 1.0, WeightZ = 1.0,
UseC3DWeightResiduals = ON,
ScaleMarkerPosOnOff = ON
) = {
  sRelOpt = {-0.015, 0.01, 0.00};
};
#endif


//////// LTHIGH ////////
#ifdef _LGTR
CreateMarkerDriver LGTR (
MarkerName= LGTR,
MarkerPlacement= Left.Leg.Seg.Thigh,
PlaceMarkerAt = EpicondylusFemorisMedialis,
OptX=OFF, OptY=OFF, OptZ=ON,
WeightX = 1.0, WeightY = 1.0, WeightZ = 1.0,
UseC3DWeightResiduals = ON,
ScaleMarkerPosOnOff = ON
) = {
  sRelOpt = {0.01, 0.34, -0.12};
};
#endif

#ifdef _LTHI01
CreateMarkerDriver LTHI01 (
MarkerName= LTHI01 ,
MarkerPlacement= Left.Leg.Seg.Thigh,
OptX=ON, OptY=ON, OptZ=ON,
WeightX = 0.25, WeightY = 0.25, WeightZ = 0.25,
UseC3DWeightResiduals = ON
) = {
  sRelOpt = {0.08, -0.15, 0.05};
};
#endif
#ifdef _LTHI02
CreateMarkerDriver LTHI02 (
MarkerName= LTHI02 ,
MarkerPlacement= Left.Leg.Seg.Thigh,
OptX=ON,OptY=ON,OptZ=ON,
WeightX = 0.25, WeightY = 0.25, WeightZ = 0.25,
UseC3DWeightResiduals  = ON
) = {
  sRelOpt = {0.00, -0.15, -0.08};
};
#endif
#ifdef _LTHI03
CreateMarkerDriver LTHI03 (
MarkerName= LTHI03 ,
MarkerPlacement= Left.Leg.Seg.Thigh,
OptX=ON, OptY=ON, OptZ=ON,
WeightX = 0.25, WeightY = 0.25, WeightZ = 0.25,
UseC3DWeightResiduals = ON
) = {
  sRelOpt = {-0.10, -0.20, 0.00};
};
#endif
#ifdef _LTHI04
CreateMarkerDriver LTHI04 (
MarkerName= LTHI04 ,
MarkerPlacement= Left.Leg.Seg.Thigh,
OptX=ON, OptY=ON, OptZ=ON,
WeightX = 0.25, WeightY = 0.25, WeightZ = 0.25,
UseC3DWeightResiduals  = ON
) = {
  sRelOpt = {0.10, -0.25, 0.00};
};
#endif
#ifdef _LTHI05
CreateMarkerDriver LTHI05 (
MarkerName= LTHI05 ,
MarkerPlacement= Left.Leg.Seg.Thigh,
OptX=ON, OptY=ON, OptZ=ON,
WeightX = 0.25, WeightY = 0.25, WeightZ = 0.25,
UseC3DWeightResiduals = ON
) = {
  sRelOpt = {0.0, -0.25, -0.08};
};
#endif
#ifdef _LTHI06
CreateMarkerDriver LTHI06 (
MarkerName= LTHI06 ,
MarkerPlacement= Left.Leg.Seg.Thigh,
OptX=ON, OptY=ON, OptZ=ON,
WeightX = 0.25, WeightY = 0.25, WeightZ = 0.25,
UseC3DWeightResiduals = ON
) = {
  sRelOpt = {-0.10, -0.25, 0.00};
};
#endif

//// Left Knee
// Lateral Knee
#ifdef _LLCO
CreateMarkerDriver LLCO (
MarkerName= LLCO,
MarkerPlacement= Left.Leg.Seg.Thigh,
PlaceMarkerAt = EpicondylusFemorisLateralis,
OptX=OFF, OptY=OFF, OptZ=ON,
WeightX = 1.0, WeightY = 1.0, WeightZ = 1.0,
UseC3DWeightResiduals = ON,
ScaleMarkerPosOnOff = OFF
) = {
  sRelOpt = {0.00, 0.00, -0.015};
};
#endif
// Medial Knee
#ifdef _LMCO
CreateMarkerDriver LMCO (
MarkerName= LMCO,
MarkerPlacement= Left.Leg.Seg.Thigh,
PlaceMarkerAt = EpicondylusFemorisMedialis,
OptX=OFF, OptY=ON, OptZ=ON,
WeightX = 1.0, WeightY = 1.0, WeightZ = 1.0,
UseC3DWeightResiduals = ON,
ScaleMarkerPosOnOff = OFF
) = {
  sRelOpt = {0.00, 0.00, 0.015};
};
#endif

//////// LSHANK ////////
#ifdef _LCAFI
CreateMarkerDriver LCAFI (
MarkerName= LCAFI,
MarkerPlacement= Left.Leg.Seg.Shank,
PlaceMarkerAt = FibularHead,
OptX=ON, OptY=ON, OptZ=ON,
WeightX = 1.0, WeightY = 1.0, WeightZ = 1.0,
UseC3DWeightResiduals = ON,
ScaleMarkerPosOnOff = ON
) = {
  sRelOpt = {0.01, -0.01, -0.015};
};
#endif
#ifdef _LTUTI
CreateMarkerDriver LTUTI (
MarkerName= LTUTI,
MarkerPlacement= Left.Leg.Seg.Shank,
PlaceMarkerAt = TibialTuberosity,
OptX=OFF, OptY=OFF, OptZ=OFF,
WeightX = 1.0, WeightY = 1.0, WeightZ = 1.0,
UseC3DWeightResiduals = ON,
ScaleMarkerPosOnOff = ON
) = {
  sRelOpt = {0.01, 0.00, 0.00};
};
#endif

#ifdef _LSHA01
CreateMarkerDriver LSHA01 (
MarkerName= LSHA01 ,
MarkerPlacement= Left.Leg.Seg.Shank,
OptX=ON, OptY=ON, OptZ=ON,
WeightX = 0.25, WeightY = 0.25, WeightZ = 0.25,
UseC3DWeightResiduals = ON
) = {
  sRelOpt = {0.05, -0.13, 0.00};
};
#endif
#ifdef _LSHA02
CreateMarkerDriver LSHA02 (
MarkerName= LSHA02 ,
MarkerPlacement= Left.Leg.Seg.Shank,
OptX=ON, OptY=ON, OptZ=ON,
WeightX = 0.25, WeightY = 0.25, WeightZ = 0.25,
UseC3DWeightResiduals = ON
) = {
  sRelOpt = {0.01, -0.13, -0.05};
};
#endif
#ifdef _LSHA03
CreateMarkerDriver LSHA03 (
MarkerName= LSHA03 ,
MarkerPlacement= Left.Leg.Seg.Shank,
OptX=ON, OptY=ON, OptZ=ON,
WeightX = 0.25, WeightY = 0.25, WeightZ = 0.25,
UseC3DWeightResiduals = ON
) = {
  sRelOpt = {-0.1, -0.13, 0.00};
};
#endif
#ifdef _LSHA04
CreateMarkerDriver LSHA04 (
MarkerName= LSHA04 ,
MarkerPlacement= Left.Leg.Seg.Shank,
OptX=ON, OptY=ON, OptZ=ON,
WeightX = 0.25, WeightY = 0.25, WeightZ = 0.25,
UseC3DWeightResiduals = ON
) = {
  sRelOpt = {0.05, -0.23, 0.00};
};
#endif
#ifdef _LSHA05
CreateMarkerDriver LSHA05 (
MarkerName= LSHA05 ,
MarkerPlacement= Left.Leg.Seg.Shank,
OptX=ON, OptY=ON, OptZ=ON,
WeightX = 0.25, WeightY = 0.25, WeightZ = 0.25,
UseC3DWeightResiduals = ON
) = {
  sRelOpt = {0.01, -0.23, -0.05};
};
#endif
#ifdef _LSHA06
CreateMarkerDriver LSHA06 (
MarkerName= LSHA06 ,
MarkerPlacement= Left.Leg.Seg.Shank,
OptX=ON, OptY=ON, OptZ=ON,
WeightX = 0.25, WeightY = 0.25, WeightZ = 0.25,
UseC3DWeightResiduals = ON
) = {
  sRelOpt = {-0.08, -0.23, 0.00};
};
#endif

// Left Lateral Ankle
#ifdef _LLMA
CreateMarkerDriver LLMA (
MarkerName= LLMA ,
MarkerPlacement=Left.Leg.Seg.Shank,
PlaceMarkerAt = LateralMalleolus,
OptX=OFF, OptY=ON, OptZ=ON,
WeightX = 1.0, WeightY = 1.0, WeightZ = 1.0,
UseC3DWeightResiduals = ON,
ScaleMarkerPosOnOff = OFF
) = {
  sRelOpt = {0.00, 0.00, -0.01};
};
#endif
// Left Medial Ankle
#ifdef _LMMA
CreateMarkerDriver LMMA (
MarkerName= LMMA ,
MarkerPlacement=Left.Leg.Seg.Shank,
PlaceMarkerAt = MedialMalleolus,
OptX=ON, OptY=ON, OptZ=ON,
WeightX = 1.0, WeightY = 1.0, WeightZ = 1.0,
UseC3DWeightResiduals  = ON,
ScaleMarkerPosOnOff = OFF
) = {
  sRelOpt = {0.00, 0.00, 0.01};
};
#endif

//////// LFOOT ////////

#ifdef _LMET01
CreateMarkerDriver LMET01(
MarkerName= LMET01,
MarkerPlacement=Left.Leg.Seg.Foot,
PlaceMarkerAt = MetatarsalJoint1Node,
OptX=OFF , OptY=OFF , OptZ=OFF,
WeightX = 1.0, WeightY = 1.0, WeightZ = 1.0,
UseC3DWeightResiduals  = ON,
ScaleMarkerPosOnOff = OFF
) = {
  sRelOpt = {0.00, 0.015, 0.00};
};
#endif

#ifdef _LTOE
CreateMarkerDriver LTOE (
MarkerName= LTOE ,
MarkerPlacement=Left.Leg.Seg.Foot,
PlaceMarkerAt = MetatarsalJoint3Node,
OptX=ON, OptY=ON, OptZ=ON,
WeightX = 1.0, WeightY = 1.0, WeightZ = 1.0,
UseC3DWeightResiduals  = ON,
ScaleMarkerPosOnOff = OFF
) = {
  sRelOpt = {-0.02, 0.02, 0.00};
};
#endif

#ifdef _LMET05
CreateMarkerDriver LMET05(
MarkerName= LMET05,
MarkerPlacement=Left.Leg.Seg.Foot,
PlaceMarkerAt = MetatarsalJoint5Node,
OptX=ON, OptY=OFF, OptZ=ON,
WeightX = 1.0, WeightY = 1.0, WeightZ = 1.0,
UseC3DWeightResiduals  = ON,
ScaleMarkerPosOnOff = OFF
) = {
  sRelOpt = {0.0, 0.00, -0.02};
};
#endif

#ifdef _LHEEL
CreateMarkerDriver LHEEL (
MarkerName= LHEEL ,
MarkerPlacement=Left.Leg.Seg.Foot,
PlaceMarkerAt = HeelNode,
OptX=OFF, OptY=OFF, OptZ=OFF,
WeightX = 1.0, WeightY = 1.0, WeightZ = 1.0,
UseC3DWeightResiduals  = ON,
ScaleMarkerPosOnOff = ON
) = {
  sRelOpt = {-0.015, 0.01, 0.00};
};
#endif


///// CONSTRAINTS /////
//#ifdef _SHO_SymmetryConstraint
//LinkDesignVars SHOXSymmetryConstraint (
//DesVar1 = RSHO_X,
//DesVar2 = LSHO_X
//) = {};
//LinkDesignVars SHOYSymmetryConstraint (
//DesVar1 = RSHO_Y,
//DesVar2 = LSHO_Y
//) = {};
//LinkDesignVars SHOZSymmetryConstraint (
//DesVar1 = RSHO_Z,
//DesVar2 = LSHO_Z,
//Coef1 =  1,
//Coef2 = -1
//) = {};
//#endif

#ifdef _AsisSymmetryConstraint
LinkDesignVars AsisXSymmetryConstraint (
DesVar1 = RASIS_X,
DesVar2 = LASIS_X
) = {};
LinkDesignVars AsisYSymmetryConstraint (
DesVar1 = RASIS_Y,
DesVar2 = LASIS_Y
) = {};
#endif

#ifdef _PsisSymmetryConstraint
LinkDesignVars PsisZSymmetryConstraint (
DesVar1 = RPSIS_Z,
DesVar2 = LPSIS_Z,
Coef1 =  1,
Coef2 = -1
) = {};
LinkDesignVars PsisXSymmetryConstraint (
DesVar1 = RPSIS_X,
DesVar2 = LPSIS_X
) = {};
#endif

#ifdef _SIS_SymmetryConstraint
LinkDesignVars SIS_XSymmetryConstraint (
DesVar1 = RASIS_X,
DesVar2 = RPSIS_X,
Coef1 =  1,
Coef2 = -1
) = {};
#endif

#ifdef _GTRSymmetryConstraint
LinkDesignVars GTRSymmetryConstraint (
DesVar1 = RGTR_Z,
DesVar2 = LGTR_Z,
Coef1 =  1,
Coef2 = -1
) = {};
#endif

#ifdef _LKneeMarkerSymmetryConstraint
CreateConstraint LKneeMarkerSymmetryConstraint ( NAME = LKneeMarkerSymmetryConstraint ) =
{
  AnyVec3 KneeCenter = Main.HumanModel.BodyModel.Left.Leg.Seg.Thigh.EpicondylusFemorisMidPoint.sRel;
  AnyVec3 KneeFrameZ = Main.HumanModel.BodyModel.Left.Leg.Seg.Thigh.KneeJointAnatomicalFrame.Z;
  AnyVec3 LatKneeMarker = Main.HumanModel.BodyModel.Left.Leg.Seg.Thigh.LMCO.sRel;
  AnyVec3 MedKneeMarker = Main.HumanModel.BodyModel.Left.Leg.Seg.Thigh.LLCO.sRel;
  // Constrain value Equal distance to knee center
  Value = vnorm(KneeCenter-LatKneeMarker)-vnorm(KneeCenter-MedKneeMarker);
};
#endif

#ifdef _RKneeMarkerSymmetryConstraint
CreateConstraint RKneeMarkerSymmetryConstraint ( NAME = RKneeMarkerSymmetryConstraint ) =
{
  AnyVec3 KneeCenter = Main.HumanModel.BodyModel.Right.Leg.Seg.Thigh.EpicondylusFemorisMidPoint.sRel;
  AnyVec3 KneeFrameZ = Main.HumanModel.BodyModel.Right.Leg.Seg.Thigh.KneeJointAnatomicalFrame.Z;
  AnyVec3 LatKneeMarker = Main.HumanModel.BodyModel.Right.Leg.Seg.Thigh.RMCO.sRel;
  AnyVec3 MedKneeMarker = Main.HumanModel.BodyModel.Right.Leg.Seg.Thigh.RLCO.sRel;
  // Constrain value Equal distance to knee center
  Value = vnorm(KneeCenter-LatKneeMarker)-vnorm(KneeCenter-MedKneeMarker);
};
#endif
Extra drivers looks like this:
// This file contains a set of auxillary drivers. They are usefull/necessary
// in some cases where the marker protocol doesn't provide enough information
// to specify all degrees of freedom. Hence, these drivers complement a
// specific driver protocol. Many of these drivers are soft, and an only serve
// to stabalize the solver in postures where the markers doesn't provide unique
// kinematic solution.

AnyFolder ExtraDrivers = {

  // --------------------------------------------------------------------------
  // The BM_MANNEQUIN drivers are used to support the degrees of freedom where
  // the markers do not provide enough information.
  // See this file for options: #path HTML_DOC "<AMMR_PATH_DOC>/bm_config/index.html"
  // --------------------------------------------------------------------------

  // Mannequin drivers are off per default, but can be activated individually
  #define BM_MANNEQUIN_DRIVER_DEFAULT ON

  #define BM_MANNEQUIN_DRIVER_NECK ON
  #define BM_MANNEQUIN_DRIVER_SKULL_THORAX_FLEXION ON
  #define BM_MANNEQUIN_DRIVER_SKULL_THORAX_LATERALBENDING ON
  #define BM_MANNEQUIN_DRIVER_SKULL_THORAX_ROTATION ON
  #define BM_MANNEQUIN_DRIVER_PELVIS_THORAX_LATERAL_BENDING ON
  #define BM_MANNEQUIN_DRIVER_PELVIS_THORAX_ROTATION ON
  #define BM_MANNEQUIN_DRIVER_PELVIS_THORAX_EXTENSION ON

  // Weak extra drivers for the subtalar joint is often necessary
  // when there is only two markers on the foot segment.
  // #define BM_MANNEQUIN_DRIVER_ANKLE_EVERSION_RIGHT ON
  // #define BM_MANNEQUIN_DRIVER_ANKLE_EVERSION_LEFT ON


#if INCLUDE_UPPERBODY == ON

  // Weak extra drivers for the shoulder is often nesesarry, with
  // almost all MOCAP marker protocols
  #define BM_MANNEQUIN_DRIVER_STERNOCLAVICULAR_AXIAL_ROTATION_RIGHT ON
  #define BM_MANNEQUIN_DRIVER_STERNOCLAVICULAR_AXIAL_ROTATION_LEFT ON

  // Weak extra drivers for the glenohumeral external rotation is
  // often necessary when there is only one marker at the elbow joint.
  #define BM_MANNEQUIN_DRIVER_GLENOHUMERAL_EXTERNAL_ROTATION_RIGHT ON
  #define BM_MANNEQUIN_DRIVER_GLENOHUMERAL_EXTERNAL_ROTATION_LEFT ON


  // Extra drivers for the wrist is necssary if there are no markers
  // on the hands.
//  #define BM_MANNEQUIN_DRIVER_WRIST_FLEXION_RIGHT ON
//  #define BM_MANNEQUIN_DRIVER_WRIST_FLEXION_LEFT ON
//  #define BM_MANNEQUIN_DRIVER_WRIST_ABDUCTION_RIGHT ON
//  #define BM_MANNEQUIN_DRIVER_WRIST_ABDUCTION_LEFT ON


  // The weights for the default mannequin drivers can be adjusted.
  // This can some times help regularized the parameter optimization
  // problem, and make it converge faster.
  Main.HumanModel.DefaultMannequinDrivers = {
      SCAxialRotationDriverRight.WeakDriverWeight = 0.5;
      SCAxialRotationDriverLeft.WeakDriverWeight = 0.5;

      GHDriverLeftExternalRotation.WeakDriverWeight = 0.01;
      GHDriverRightExternalRotation.WeakDriverWeight = 0.01;
  };


#endif


  // This link to the mannequin drivers ensures they are picked up by the study.
  AnyFolder& MannequinDrivers = Main.HumanModel.DefaultMannequinDrivers;

};
PS: Is there a BM_MANNEQUIN switch to display/hide the thorax, neck and head segments?
Best regards
Max
Hi Max,
The setting
#define BM_MANNEQUIN_DRIVER_DEFAULT ON
Will enable weak drivers for all joints in the model
I would write
#define BM_MANNEQUIN_DRIVER_DEFAULT OFF
and leave the other BM_MANNEQUIN unchanged.
Best regards
Søren
Hi Søren
I changed BM_MANNEQUIN_DRIVER_DEFAULT to OFF. However, that did not seem to be the problem.
For 3 of the 10 subjects the ParameterIdentification of the standing reference trial does not seem to converge anymore. Maybe the marker protocol is too constrained? The anyset looks like this:
Main.ModelSetup.MocapDrivers.TH12.sRelOptEdit = {-nan(ind), -nan(ind), 0.0};
Main.ModelSetup.MocapDrivers.L5.sRelOptEdit = {-nan(ind), -nan(ind), 0.0};
Main.ModelSetup.MocapDrivers.RASIS.sRelOptEdit = {-nan(ind), -nan(ind), 0.0};
Main.ModelSetup.MocapDrivers.LASIS.sRelOptEdit = {-nan(ind), -nan(ind), 0.0};
Main.ModelSetup.MocapDrivers.RPSIS.sRelOptEdit = {-nan(ind), -nan(ind), 0.0};
Main.ModelSetup.MocapDrivers.LPSIS.sRelOptEdit = {-nan(ind), -nan(ind), 0.0};
Main.ModelSetup.MocapDrivers.RPELV01.sRelOptEdit = {-nan(ind), -nan(ind), -nan(ind)};
Main.ModelSetup.MocapDrivers.LPELV01.sRelOptEdit = {-nan(ind), -nan(ind), -nan(ind)};
Main.ModelSetup.MocapDrivers.RPELV02.sRelOptEdit = {-nan(ind), -nan(ind), -nan(ind)};
Main.ModelSetup.MocapDrivers.LPELV02.sRelOptEdit = {-nan(ind), -nan(ind), -nan(ind)};
Main.ModelSetup.MocapDrivers.RGTR.sRelOptEdit = {0.0, 0.0, -nan(ind)};
Main.ModelSetup.MocapDrivers.RTHI01.sRelOptEdit = {-nan(ind), -nan(ind), -nan(ind)};
Main.ModelSetup.MocapDrivers.RTHI02.sRelOptEdit = {-nan(ind), -nan(ind), -nan(ind)};
Main.ModelSetup.MocapDrivers.RTHI03.sRelOptEdit = {-nan(ind), -nan(ind), -nan(ind)};
Main.ModelSetup.MocapDrivers.RTHI04.sRelOptEdit = {-nan(ind), -nan(ind), -nan(ind)};
Main.ModelSetup.MocapDrivers.RTHI05.sRelOptEdit = {-nan(ind), -nan(ind), -nan(ind)};
Main.ModelSetup.MocapDrivers.RTHI06.sRelOptEdit = {-nan(ind), -nan(ind), -nan(ind)};
Main.ModelSetup.MocapDrivers.RMCO.sRelOptEdit = {0.0, -nan(ind), -nan(ind)};
Main.ModelSetup.MocapDrivers.RLCO.sRelOptEdit = {0.0, 0.0, -nan(ind)};
Main.ModelSetup.MocapDrivers.RCAFI.sRelOptEdit = {-nan(ind), -nan(ind), -nan(ind)};
Main.ModelSetup.MocapDrivers.RTUTI.sRelOptEdit = {0.0, 0.0, 0.0};
Main.ModelSetup.MocapDrivers.RSHA01.sRelOptEdit = {-nan(ind), -nan(ind), -nan(ind)};
Main.ModelSetup.MocapDrivers.RSHA02.sRelOptEdit = {-nan(ind), -nan(ind), -nan(ind)};
Main.ModelSetup.MocapDrivers.RSHA03.sRelOptEdit = {-nan(ind), -nan(ind), -nan(ind)};
Main.ModelSetup.MocapDrivers.RSHA04.sRelOptEdit = {-nan(ind), -nan(ind), -nan(ind)};
Main.ModelSetup.MocapDrivers.RSHA05.sRelOptEdit = {-nan(ind), -nan(ind), -nan(ind)};
Main.ModelSetup.MocapDrivers.RSHA06.sRelOptEdit = {-nan(ind), -nan(ind), -nan(ind)};
Main.ModelSetup.MocapDrivers.RLMA.sRelOptEdit = {0.0, -nan(ind), -nan(ind)};
Main.ModelSetup.MocapDrivers.RMMA.sRelOptEdit = {-nan(ind), -nan(ind), -nan(ind)};
Main.ModelSetup.MocapDrivers.RMET01.sRelOptEdit = {0.0, 0.0, 0.0};
Main.ModelSetup.MocapDrivers.RTOE.sRelOptEdit = {-nan(ind), -nan(ind), -nan(ind)};
Main.ModelSetup.MocapDrivers.RMET05.sRelOptEdit = {-nan(ind), 0.0, -nan(ind)};
Main.ModelSetup.MocapDrivers.RHEEL.sRelOptEdit = {0.0, 0.0, 0.0};
Main.ModelSetup.MocapDrivers.LGTR.sRelOptEdit = {0.0, 0.0, -nan(ind)};
Main.ModelSetup.MocapDrivers.LTHI01.sRelOptEdit = {-nan(ind), -nan(ind), -nan(ind)};
Main.ModelSetup.MocapDrivers.LTHI02.sRelOptEdit = {-nan(ind), -nan(ind), -nan(ind)};
Main.ModelSetup.MocapDrivers.LTHI03.sRelOptEdit = {-nan(ind), -nan(ind), -nan(ind)};
Main.ModelSetup.MocapDrivers.LTHI04.sRelOptEdit = {-nan(ind), -nan(ind), -nan(ind)};
Main.ModelSetup.MocapDrivers.LTHI05.sRelOptEdit = {-nan(ind), -nan(ind), -nan(ind)};
Main.ModelSetup.MocapDrivers.LTHI06.sRelOptEdit = {-nan(ind), -nan(ind), -nan(ind)};
Main.ModelSetup.MocapDrivers.LLCO.sRelOptEdit = {0.0, 0.0, -nan(ind)};
Main.ModelSetup.MocapDrivers.LMCO.sRelOptEdit = {0.0, -nan(ind), -nan(ind)};
Main.ModelSetup.MocapDrivers.LCAFI.sRelOptEdit = {-nan(ind), -nan(ind), -nan(ind)};
Main.ModelSetup.MocapDrivers.LTUTI.sRelOptEdit = {0.0, 0.0, 0.0};
Main.ModelSetup.MocapDrivers.LSHA01.sRelOptEdit = {-nan(ind), -nan(ind), -nan(ind)};
Main.ModelSetup.MocapDrivers.LSHA02.sRelOptEdit = {-nan(ind), -nan(ind), -nan(ind)};
Main.ModelSetup.MocapDrivers.LSHA03.sRelOptEdit = {-nan(ind), -nan(ind), -nan(ind)};
Main.ModelSetup.MocapDrivers.LSHA04.sRelOptEdit = {-nan(ind), -nan(ind), -nan(ind)};
Main.ModelSetup.MocapDrivers.LSHA05.sRelOptEdit = {-nan(ind), -nan(ind), -nan(ind)};
Main.ModelSetup.MocapDrivers.LSHA06.sRelOptEdit = {-nan(ind), -nan(ind), -nan(ind)};
Main.ModelSetup.MocapDrivers.LLMA.sRelOptEdit = {0.0, -nan(ind), -nan(ind)};
Main.ModelSetup.MocapDrivers.LMMA.sRelOptEdit = {-nan(ind), -nan(ind), -nan(ind)};
Main.ModelSetup.MocapDrivers.LMET01.sRelOptEdit = {0.0, 0.0, 0.0};
Main.ModelSetup.MocapDrivers.LTOE.sRelOptEdit = {-nan(ind), -nan(ind), -nan(ind)};
Main.ModelSetup.MocapDrivers.LMET05.sRelOptEdit = {-nan(ind), 0.0, -nan(ind)};
Main.ModelSetup.MocapDrivers.LHEEL.sRelOptEdit = {0.0, 0.0, 0.0};
Main.HumanModel.Anthropometrics.SegmentDimensions.PelvisWidth = 0.17599999999999999;
Main.HumanModel.Anthropometrics.SegmentDimensions.HeadHeight = 0.13;
Main.HumanModel.Anthropometrics.SegmentDimensions.TrunkHeight = -nan(ind);
Main.HumanModel.Anthropometrics.SegmentDimensions.Right.ThighLength = -nan(ind);
Main.HumanModel.Anthropometrics.SegmentDimensions.Right.ShankLength = -nan(ind);
Main.HumanModel.Anthropometrics.SegmentDimensions.Right.FootLength = -nan(ind);
Main.HumanModel.Anthropometrics.SegmentDimensions.Right.TalusLength = 0.034278183000000004;
Main.HumanModel.Anthropometrics.SegmentDimensions.Right.UpperArmLength = 0.29999999999999999;
Main.HumanModel.Anthropometrics.SegmentDimensions.Right.LowerArmLength = 0.23000000000000001;
Main.HumanModel.Anthropometrics.SegmentDimensions.Right.HandLength = 0.182;
Main.HumanModel.Anthropometrics.SegmentDimensions.Right.HandBreadth = 0.085000000000000006;
Main.HumanModel.Anthropometrics.SegmentDimensions.Left.ThighLength = -nan(ind);
Main.HumanModel.Anthropometrics.SegmentDimensions.Left.ShankLength = -nan(ind);
Main.HumanModel.Anthropometrics.SegmentDimensions.Left.FootLength = -nan(ind);
Main.HumanModel.Anthropometrics.SegmentDimensions.Left.TalusLength = 0.034278183000000004;
Main.HumanModel.Anthropometrics.SegmentDimensions.Left.UpperArmLength = 0.29999999999999999;
Main.HumanModel.Anthropometrics.SegmentDimensions.Left.LowerArmLength = 0.23000000000000001;
Main.HumanModel.Anthropometrics.SegmentDimensions.Left.HandLength = 0.182;
Main.HumanModel.Anthropometrics.SegmentDimensions.Left.HandBreadth = 0.085000000000000006;
Main.HumanModel.BodyModel.Right.Leg.Seg.Thigh.KneeJoint.VarusValgusRotation = 0.0;
Main.HumanModel.BodyModel.Left.Leg.Seg.Thigh.KneeJoint.VarusValgusRotation = 0.0;
Kind regards
Max
Hi Max,
My guess is that you have too many open variables in the model to be optimized… so you will need to lock some markers position, to fix this. I would take a close look at each marker and determine if the position of it needs to be locked or not.
As an example of such a problem imagine this:
Foot Segment all marker free to be optimized: Then the foot scale is undetermined because any size will work it can just move makers, Same for ankel flexion any angle will be ok markers could just be moved…
I am not saying the foot is the problem here but one or several of you design variables might be undetermined, so you will need to remove the right variables.
Typical areas of trouble could be (i do not recall your protocol):
Best regards
Søren
Hi Søren
The marker protocol worked fine until I introduced the ASIS PSIS constraint to control the pelvic tilt and removed some upper body markers. Both actions were recommended by Morten.
I posted the protocol four posts above.
Maybe you could have a look, if you see something suspicious?
Kind regards
Max
Hi Max,
I looked at images, the pelvis markers on pelvis all looks to be on, please try lock some of these.
Best regards
Søren
This topic was automatically closed 125 days after the last reply. New replies are no longer allowed.