Morphing my Landmarks with different patients anthropometrics

Hey everyone,

I’m using a vertebra template (e.g., L5) from the standard 175 cm human model to define landmarks for morphing. Then, I apply the landmarks on a patient-specific STL as explained in the Tutorial. This approach works well - I can morph the vertebra and run simulations, but only as long as I keep the model height at 175 cm.

When I change the model height to match the patient's anthropometrics, to scale the rest of the body segments accordingly, the simulation loads but fails at the first timestep. My assumption is that the anthropometric scaling is conflicting with the custom, landmark-based morphing—possibly because I’m always using the STL from the standing model at 175 cm as the source morphing reference.

Does anyone have advice on how to properly integrate the anthropometric scaling with the landmark-based morphing, so that the model can adapt to different patient heights without breaking?

Thanks in advance!
Best regards,
Viki

Hi Viktoria,

It should not be a problem. The idea is that the landmarks are taken from an unscaled geometry and then morphed without any pre-steps, such as anthropometric scaling. We will simply replace the scaling function with the RBF one.
I think we would need to see somehow how the simulation fails. Could you make screenshots of the constraint errors and the model view?

Kind regards,
Pavel

Hi Pavel,

The morphing is working much better now. I realized that loosening the joint positions—now calculated based on landmarks at the endplates—allowed Anybody to find a more accurate morphing solution.

When I morph the spine directly into the target position (without applying a rigid reverse transformation), Anybody is able to find the correct alignment without any issues.

However, since structures like the ribcage and muscles are based on the anthropometric reference posture, I run into problems when trying to use the morphed model directly.

To resolve this, I apply a rigid transformation to align the morphed spine with a scaled Anybody template (scale matching the patient size). This brings the spine back into an anthropometric "anybody" posture, and features like the ribcage and muscle are correctly implemented.

For joint positioning, I currently use landmarks at the centers of the upper and lower endplates of each vertebra—first morphed to match the patient geometry, then rigidly transformed to align with the scaled template vertebra. While this approach maintains correct geometric morphing, it reintroduces the intervertebral distances from the scaled Anybody template, rather than preserving the patient-specific anatomy.

Main Issue: Intervertebral Distance

As a result, when I apply the actual vertebral orientations from the patient data, the joint constraints become problematic—the vertebrae achieve the correct orientation, but not the correct position, because the joint-vertebra chain is effectively too short to reach the target configuration.


I've tried many approaches to find a way to introduce patient-specific but haven’t found a way to define patient-specific intervertebral distances. Do you have any ideas or suggestions? I was also wondering if Hamed may have encountered similar issues in his work and might know of a potential solution.

Would there be a way to manipulate the intervertebral distances in the model (before or after I load the model) to make them patient-specific?

I do have the correct joint positions, but of cause only in the target patient data. Ideally, I’d like to use these to define JntPos more accurately.

Any advice or suggestions would be greatly appreciated!

Thanks so much again for your help!

Best regards,
Viktoria

Hi Viktoria,

Yes, what happens is that the joint nodes are being morphed with the vertebral geometry and those might not "behave" due to the extrapolative behavior in those regions or because they are simply not what you think.

I would typically remove the native AnyBody joints and replace them with the patient-specific ones. It is probably quicker to do than fixing kinematics with the morphed joint nodes. So you can use MechObjectExclude in your study to exclude existing joints and rhythms and add your own. Or you can update sRels/ARels of joint nodes to be patient-specific ones to have more accurate location. I am attaching a piece of code that can help:

#define CHANGE_SREL(SEG, OBJ, POS) \
AnyOperationSetValue ChangeMuscleIns##OBJ= {\
AnyFloat PertubationVectorInSegmentalRef=POS;\
Target = {&SEG.OBJ.sRel};\
Source = {&PertubationVectorInSegmentalRef};\
}
AnyFloat customL1L2JntNode = {0.01637556, 0.3168638, 0.03283635}; // here the joint node pos should be in the segmental coordinate system
CHANGE_SREL(Main.HumanModel.BodyModel.Trunk.SegmentsLumbar.L1Seg, L1L2JntNode,.customL1L2JntNode);

CHANGE_SREL needs to be added to a PreOperation folder of the first step of your analysis.

The joint location can be computed based on shape of the intervertebral space. For example, for the lumbar spine it is described here: Instantaneous axes of rotation of the lumbar intervertebral joints - PubMed

I hope this helps.

Kind regards,
Pavel

Hey Pavel,

thank you so much for your help and the paper!

Patient Specific Joints

Currently, I’m manually switching joint positions in each segment like this:

AnyRefNode L4L5JntNode = {
#if MANUAL_JOINT_POS
sRel = Main.HumanModel.BodyModel.Trunk.Data.Patient.Joint_pos.L4L5_sRel;
#else
sRel = .Scale(.Data.L4L5JntNode_pos);
#endif

If I understand your approach correctly, I could define a macro to update the joint node positions using a PreOperation. This would allow me to assign new joint positions dynamically (after model loading), without modifying the segment definitions themselves.

These updated positions would need to be defined relative to the segmental coordinate system. Just to clarify: when referring to the segmental frame, do you mean the Anatomical Frame of the segment (as defined in the Trunk model), or a frame located at the segment’s center of mass?

Regarding the joint positions I plan to update:
Would it be better to first transform them into the estimated “Anybody posture” (i.e., the anthropometrically scaled posture), or can I directly use the raw patient-specific joint positions? I'm concerned that applying patient-specific values directly might cause inconsistencies — particularly in relation to ribcage geometry and muscle attachments that were defined using the scaled model.

Also, I haven’t yet used PreOperations in a study setup — would you happen to have a simple example of how to implement one properly?

Anybody Pipeline for unscaled data

Also I’d really appreciate a brief explanation of how anybodys unscaled input data is processed within the Anybody pipeline — particularly in relation to default or custom Scaling Functions and PreOperations. My initial morphing issue came from the mistake of not handeling the unscaled data correctly when applying a custom scaling.

Could you clarify at what stage in the model initialization the PreOperations are executed? Do they apply before or after the custom scaling is applied and before or after loading?

Thanks again for your support — it’s a huge help!

Best regards,

Best regards,

Strictly speaking, we are using a "classoperation" of the sRel object. It has a property called evaluation moment, which is set to be DesignVar. Variables with this label can be overwritten when the model is loaded. Classoperations are action that you can take when right-clicking on objects in AnyBody. For example, you can "Dump" the value into the log window, or you can change sRel.

But the sequence of operations in AnyBody matters, since changing sRel after you ran your calibration and inverse dynamics studies would have no effect. This is why we add our change to a PreOperation of your analysis (just a placeholder for operations that need to be executed first). For example, it could be in Main.MyStudy.InverseDynamicsStudy.PreOperation = { ..type your code here..};

Ideally you don't want to change the repository. All changes to the model can be done externally. Once you modify the AMMR, our support team operates on assumption that the AMMR is correct, which might not be the case, since this is no longer our product.

Segmental CS is not at the center of mass, but where everything is defined for a particular segment. CoM has an sRel itself, which is defined in the segmental CS.

If you're changing joint definition, you need to take care of the "0-posture" yourself. Ideally, when you drive the model into this posture it should become your ref. posture, i.e. a CT scan. Anthropometric scaling is ignored when you do bone morphing. The pipeline will start directly with the unscaled AnyBody geometry and will deform it into a patient-specific one. Internal transformations such as transformations to the Anatomical Scaling Frame will happen automatically if you apply TSeg2ScaleFrame to your source entities.

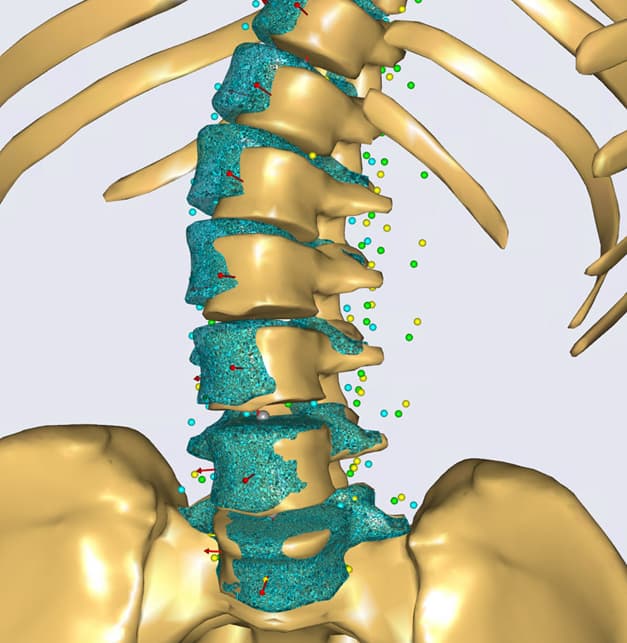
For example, when we create a landmark based morphing it will look like this, notice the highlights:

AnyFunTransform3DLin Transform = {
ScaleMat = {{1,0,0},{0,1,0},{0,0,1}};
Offset = {0,0,0};
PreTransforms = {&.RBFTransform, &.ReverseTransform};
};

AnyFunTransform3DLin2 AffineTransform = 
{
  //PreTransforms = {};
  Points0 = .**TSeg2ScaleFrame**(.SourceLandmarks);
  Points1 = .TargetLandmarks;
  
  Mode = VTK_LANDMARK_AFFINE;
};

AnyFunTransform3DLin2 ReverseTransform = {
  Points0 = .AffineTransform.Points1;
  Points1 = .AffineTransform.Points0;
  Mode = VTK_LANDMARK_RIGIDBODY;
};

AnyFunTransform3DRBF RBFTransform = 
{
  PreTransforms = {&.AffineTransform};
  RBFDef = 
  {
    Type = RBF_Triharmonic;
    Param = 1;
  };
  Points0 = .AffineTransform.Points0;
  Points1 = .AffineTransform.Points1;
  
  BoundingBox = 
  {
    Type = BB_Cartesian;
    ScaleXYZ = 2*{1, 1, 1};
    DivisionFactorXYZ = 5*{1, 1, 1};
  };
  BoundingBoxOnOff = On;
};  

Kind regards,
Pavel